May 8, 2020 13 min read
Helping Workers Develop Problem-Solving Skills
Industry:
Solution:

Work is easier when everything goes perfectly and there are no problems.
But as you probably know, “perfect” is a rare state. Problems pop up from time to time and workers need to solve them.
As a result, it’s important that workers be effective problem solvers. Having a workforce with well-developed problem-solving skills is a significant competitive advantage for a company.
All workers benefit from strong problem-solving skills. For example, we have a customer who led a training system upgrade for a major, multi-site manufacturing company in the United States (they make common household products and the odds are very good you’ve used their products). He would often tell me that he wanted to “help his machine operators become machine engineers.” (Hello to you, Steve, if you happen to be reading this.)
What our customer Steve meant by that was, at least in part, that he wanted workers to have problem-solving skills so they could address problems on their own at work to decrease downtime, increase efficiency, and maximize production.
But those problem-solving skills don’t come “built-in” to every person. And even those with a natural knack for it can always get better, or learn to apply those skills more effectively in a given work circumstance. And as a result, it’s a good idea to provide resources to help workers develop and use problem-solving skills at work. That’s what this article will focus on.
In addition to this article, also feel free to check out our article on Continuous Improvement at Work, as problem-solving is also a big part of continuous improvement and that article provides a long list of tips to help with problem-solving and continuous improvement.
Vector EHS Management Software empowers organizations – from global leaders to local businesses – to improve workplace safety and comply with environmental, health, and safety regulations.
Learn more about how our software can save you valuable time and effort in recording, tracking, and analyzing your EHS activities.
Learn more about how we can help:
- Incident Management Software →
- EHS Inspection Software →
- Key Safety Metrics Dashboard →
- Learning Management System (LMS) and Online Training Courses →
- Mobile Risk Communication Platform
Download our EHS Management Software Buyer’s Guide.
Introduction: How You Can Help Workers Develop Problem-Solving Skills
There are a number of things you can do to help workers develop effective problem-solving skills that they can use at your workplace. Those include:
- Helping them acquire basic job knowledge
- Helping them develop basic job skills
- Providing process training so they’ll understand your work processes and how machines and equipment function
- Introducing them to structured problem-solving methods they can apply to solve any sort of problem
- Help make workers aware of common cognitive biases that may lead them to mistaken understandings of the problem or potential solutions
- Helping employees become better systems thinkers
- Creating resources (job aids) to help them problem-solve the most common problems at your worksite
- Creating opportunities for them to practice those problem-solving skills and that problem-solving method at your workplace
- Creating communities of practice and learning teams so employees can continue learning from and problem-solving with their peers
We’ll look at each of these steps in the following sections.
Plan-Do-Check-Act (PDCA) Infographic
Problem-solving & continuous improvement tool from lean.
Yes! I Want this Infographic!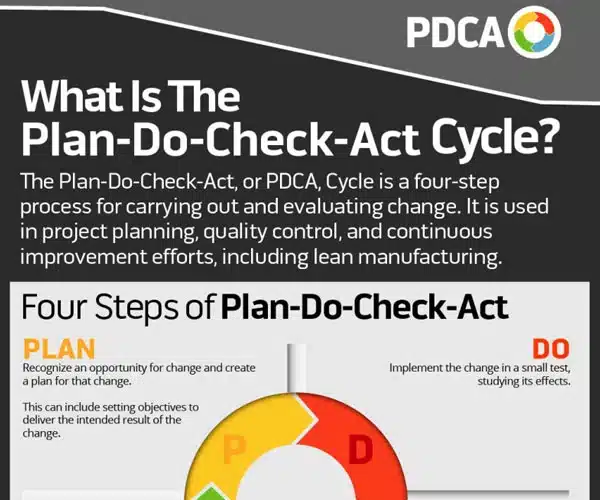
Helping Employees Acquire Basic Job Knowledge
A well-planned employee training program will help workers understand basic job knowledge, develop basic job skills, and then develop advanced job skills.
The first step of that is to help employees acquire the basic job knowledge they need to perform their job.
This includes stuff like “we produce five grades of paper” and “this is the boiler” and other simple, knowledge-based training.
We won’t go into much more detail about that here, but know that we cover it more for you in this article if you want to read more, and that it’s a critical-but-easy-to-overlook aspect of training if you want to quickly move the worker up to the point where they’re effectively solving problems.
Helping Employees Develop Basic Job Skills
In the same way that you need to provide training so workers can acquire basic job knowledge, you’ve got to help them acquire basic job skills as well.
Again, this is important in general, but it will also help the worker develop problem-solving skills (because it will help him/her know “how stuff works”).
As with the previous point, we won’t be going into detail here, but we’ve got an entire article on the topic if you’re feeling curious.
Providing Process Training to Employees
Process training is training that explains how a process works.
You can explain a lot of different kinds of processes with process training. For example, you could explain how a software program is developed. Or, in manufacturing, you could use process training to explain the process by which you make your product.
Here’s a short example from a process training eLearning course about recaustisizing (a papermaking process):
Providing employees with effective process training will make it easier for them to apply problem-solving methods to your work processes. That process training can be in many different forms. We’ve provided an eLearning example above, but it can include verbal discussions, classroom-style instructor-led training, written training materials, videos, and more.
If you’d like to learn more about that, we’ve got an entire article devoted to how process training can improve troubleshooting skills (troubleshooting is a form of problem solving, after all).
Pro Tip: To learn more about how process training can improve problem solving and troubleshooting, check the following two books by Dr. Ruth Colvin Clark:
- Building Expertise: Cognitive Methods for Training and Performance Improvement (most notably the chapter titled “Problem-Centered Instruction” and its discussion of the “Sherlock” training program on pages 298 and 299)
- Developing Technical Training: A Structured Approach for Developing Classroom and Computer-Based Instructional Materials (most notably the chapter titled How to Teach Processes, where she explains that “if a technician is faced with a problem on some equipment, more effective troubleshooting will result from an understanding of the technical equipment process.”)
We have a book review of the second book here.
Helping Workers Be Aware of Common Cognitive Biases
It’s helpful to know that all people–including you and me–have cognitive biases that may make us:
- Mistakenly identify a workplace problem
- Come to incorrect explanations of what causes the problem
- Create poor solutions for the problem
Being aware that we’re subject to cognitive biases is half the battle. Finding ways to reflect and bounce ideas off of other people can help us avoid these biases and come to better understandings and following actions.
Check out our article on Daniel Kahneman’s book Thinking, Fast and Slow for more on this.
Making Employees Aware of Systems Thinking
One of the hazards people easily fall into when problem-solving is taking a view that’s too narrow.
Systems thinking is a way to take a more holistic, big-picture, “all things are connected” kind of view that will help us make changes that really lead to performance improvement.
Read our article on Systems Thinking for Workplace Performance Improvement for more on this.
Introducing Employees to Structured Problem-Solving Methods
Once your employees have the fundamental knowledge and skills mentioned above, plus an understanding of your work processes, you can begin working with them to develop their problem-solving skills.
The first part of that is to make sure they know the best way to approach problem solving.
As you may know, if a person is trying to solve a problem in a somewhat random, ad-hoc manner, it’s easy to wind up wasting time and resources. That’s why people recommend a structured problem-solving method that includes working through the following seven steps:
- Define problem
- Gather information
- List possible root causes
- Identify most likely root cause
- Test and confirm root cause
- Generate potential solutions
- Decide on a solution
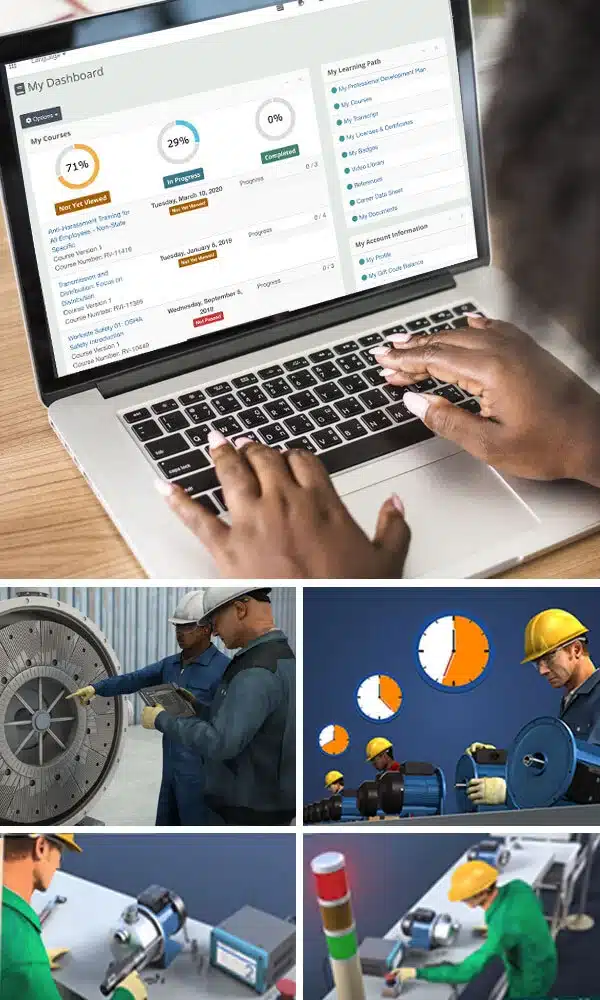
Here’s a short sample from an eLearning course on problem solving that helps to introduce that method.
We can break that down even further, because there are additional tools/techniques that people can use as they progress through the problem-solving strategy to try to come up with a list of all potential causes and identify the most likely root cause, including:
- Brainstorming
- The 5 Whys
- Fishbone diagrams, also known as Ishikawa Diagrams and (perhaps you recognized the fish bone icon in the image at the top of this post?)
- Failure Modes and Effects Analysis (FMEA)
- A3 Problem Solving Method
Although the samples above introduce the problem-solving method and a few problem-solving tools in an eLearning course, you can introduce the method in any manner, including:
- Verbal discussion
- Written material, such as a PDF
- PowerPoint or Prezi Presentation
- Video
- Etc.
As a final tip, you may want to consider using refresher training from time-to-time to remind the worker of this method and these tools. In that case, you could do something like use the eLearning course to introduce it, and then assign periodic refresher training in the form of a quick PDF for the worker to read or even a quick online quiz for the worker to complete.
Helping Workers Learn to Apply Those Problem-Solving Skills at Your Workplace: Job Aids and Problem-Solving Practice
Now you’ve set the table nicely.
By this time, the worker knows the basic job knowledge and has the basic job skills that will help him/her become an effective problem solver. The worker also has a firm understanding of the work processes at your area (because this is where the worker will be applying that problem solving). And, the worker knows a structured method of problem-solving and the benefits of using it.
But that doesn’t mean the worker is going to be an expert problem solver just yet. In fact, that’s not likely, and in many cases, a worker with this solid foundation will still take years of job experience to transition into that experienced and highly valuable problem solver of your dreams (or, to return to the comment from my customer at the beginning of this article, to become the “machine operator who’s also a machine engineer”).
But who wants to wait a long time–weeks, months, or even years, depending on the complexity of the job and the problems the worker will face? And even if you do wait for years for these skills to become finely honed, it doesn’t mean the worker will always identify the most likely root cause early in the problem-solving method instead of getting distracted and spending time on less likely root causes.
Wouldn’t you like to dramatically compress the time frame necessary to fully hone these problem-solving skills, and help the worker learn to problem-solve as efficiently as possible?
What if you could help a worker develop problem-solving skills in six months that would otherwise take ten years to develop?
What if the problem-solving skills developed in the compressed time frame were more comprehensive (instead of relying on the hit-and-miss approach of problems the worker happened to run into during the job)?
If this all sounds good to you, read the next two steps, below.
Creating Resources (Job Aids) To Help Workers Solve Most Common Problems at Your Work Site
It’s great to have a worker with this fundamental level of knowledge and skills about problem-solving and your work processes.
But why send that worker out “into the wild” alone, without additional tools?
Instead, if you create some problem-solving job aids related to the most common problems at your work area, and make it easy for the worker to access that job aid, you’ll give the worker yet another step up, and of course you’ll get your problems solved more quickly and effectively.
These problem-solving job aids don’t have to be anything fancy. It can be as simple as the table below, for example.
| Problem | Most Likely Root Cause(s) | How to Test the Root Cause(s) |
|---|---|---|
| Problem X | Root Cause(s) X | Go to…. |
| Problem Y | Root Cause(s) Y | Open the…. |
| Problem Z | Root Cause(s) Z | Check the…. |
So what does it take to create these problem-solving job aids?
Most importantly, it requires a familiarity with your work processes and equipment, the kinds of problems that have most commonly occurred over time, and the most common solutions to these problems (side tip: it’s not a bad idea to document these over time so you develop a sort of problem-solving/solution “database” of sorts).
Places to find this information include:
- Your own knowledge
- Knowledge of work area or department managers
- Rank and file workers, especially your most experienced workers (and others with proven track records of problem solving at your workplace)
- Your own engineers
- Equipment manufacturers, including their manuals and documentation
- Equipment and supply vendors
- Process consultants
Once you’ve gotten this information together, you can make it available in a number of different formats. For example, written documents stored in a file cabinet that’s easily available to workers (both where they need it and when they need it) can be a great help.
Of course, there’s been a big trend toward digitizing this information and making it available to workers using mobile devices in the workplace. You may want to consider this, because it makes it much easier for your worker to access this information, and that in turn makes it much more likely that they WILL access and use it. Plus it means they’ll spend less time searching for it.
Here’s what one of these digitized problem-solving job aids viewed on a mobile device in the work area might look like:

And since we mentioned making it easier and faster to access these job aids, wouldn’t it be cool if a worker could use a barcode reader built into the mobile device and automatically come up with a list of problem-solving/troubleshooting job aids relevant to a given work area, machine, or process? It’s possible now, as shown below.

Creating Opportunities for Workers to Practice Problem-Solving Skills at Work
One last thing to consider that can really pay off is to create problem-solving training scenarios that allow your workers to practice their problem-solving skills in circumstances like the ones they’ll face in the real work world.
There are a few major benefits of this. They include:
- Dramatically compressing the amount of time it takes to become an effective problem-solver at your workplace (in some cases, training like this has been shown to compress a 10-year learning curve from pure work experience into as little as six months)
- Creating training that prepares workers for a more comprehensive set of problems (instead of merely relying on the somewhat haphazard, random set of problems that people experience and ultimately learn from during their own personal job experience)
- Creating training that helps a greater percentage of your employees (instead of just the same ones called on as a result of their proven troubleshooting expertise)
When creating training like this, keep the following points in mind:
- The training must accurately mirror real problems and real work situations
- The training must allow the worker to practice in a consequence-free environment
- The training must allow the worker to know what the consequences of their actions and decisions would be in real life (even if, during the training, those real-world consequences don’t occur)
- The training must provide feedback to the worker to help them understand the consequences of their decision and to hone their problem-solving capabilities
The training could include “models” of the problem-solving techniques that an expert problem-solver would apply to the same work process and work problems (this allows the worker to compare their own ideas against a “benchmark” to see where they could improve).
Finally, this training can occur in a number of different formats (or a mixture of formats), including:
- Verbal discussions
- Simulations set up onsite or in locations such as local community colleges
- eLearning simulations
Here’s an example:

eLearning courses like this one can help you deliver scenario-based training that helps your workers develop problem-solving skills and learn to apply them to your own work processes.
This type of training is often called scenario-based training. For more information about scenario-based training, we recommend you check this article on scenario-based training in manufacturing.
Helping Workers Create Communities of Practice and Other Forms of Collaborative Learning and Problem-Solving with Their Peers
People generally solve problems more effectively when they interact with other people. As a manager or supervisor, you can improve problem-solving by helping workers participate in in communities of practice and other collaborative problem-solving methods.
Consider helping workers learn to use some of these collaborative problem-solving methods:
- Learning teams
- Designing thinking workshops
- Hackathons
- Communities of practice (like-minded professionals sharing ideas and tips and learning from one another)
- Before action reviews and after action reviews
Workers will generally find their solutions to problems are more effective when created in a collaborative environment.
Conclusion: Training Workers to Become More Effective Problem Solvers at Your Workplace
Well, that’s our overview. Hope it helped.
As a reminder, we walked through the following aspects of providing training to help your workers become more effective problem solvers:
- Helping them acquire basic job knowledge
- Helping them develop basic job skills
- Providing process training so they’ll understand your work processes and how machines and equipment function
- Introducing them to a structured problem-solving method they can apply to solve any sort of problem
- Creating resources (job aids) to help them problem-solve the most common problems at your worksite
- Creating opportunities for them to practice those problem-solving skills and that problem-solving method at your workplace
For some related thoughts, check our Helping Employees Learn to Learn article, which is an interview with Arun Pradhan. And you might also enjoy these tips on problem solving and innovation from the people at Freakonomics.
What thoughts of your own would you add? What are your experiences?